Elastomer manufacturing moulding processes

Compression moulding
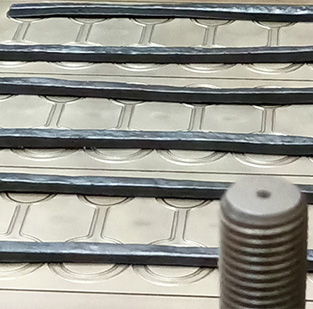
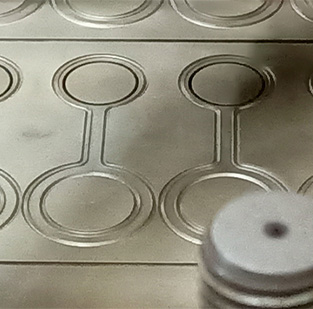
This is the simplest method of converting a piece of rubber into a finished seal product. The rubber compound is first mixed and prepared, and depending on the recipe can require up to 30 different individual ingredients. At this stage the curing (or vulcanization) of the rubber hasn’t yet taken place, therefore, the material has a stiff and non-elastic consistency (a little like thick dough). From this dough we produce a rubber blank (also known as a pre-form) by either cutting, punching or extruding cord. These blanks are normally a little bigger than the finished part (normally based on weight) and are placed into a metal moulding tool. The tool (in its simple form) is in two halves with the final product shape cut into the metal. This is known as the mould cavity.
This “sandwich” of the bottom tool/rubber blank/top tool is placed into a hydraulic compression press with heated platens. This transfers the heat into the rubber via the metal tool. The press closes. The rubber is then squeezed into every part of the cavity, and any extra material that extrudes from the mould join becomes become overflow, or flash. Next comes curing of the material. This takes place through a chemical reaction between the ingredients, and is controlled by pressure, temperature and time. These parameters are pre-set according to the recipe of the material and the curing system.
At the end of the specified cure time, the press is opened. The tool is then removed and split apart, and the cured (elastic) component is removed. Through a variety of methods, the excess flash is then detached, and the part may undergo a post-cure process. This fully completes the vulcanization reaction. Finally, the rubber seal is inspected, packaged and ready for application.
The compression moulding process
Compression moulding is sometimes a relatively slow and labour-intensive process. Some tools will have multiple cavities into the hundreds and use presses ranging in size and capacity from 20 tons to over 500 tons. This will increase throughput of seals, but the key limiting factor is the speed of heat transfer from the platens into the rubber via the mould tool. In-press cure times can be measured in minutes, but for large parts sometimes over 10 minutes or more. Removing the parts and loading the next set of rubber blanks can also be time consuming.
Compression tools are quick and easy to produce, and changeover times from one component to another can be rapid. As a result, this manufacturing method is ideally suited to parts that are required in low quantities, or as prototypes. The tools are designed to ensure that the split/flash line is not located on a sealing contact surface. Therefore, high-quality parts will be produced.
For some very hard rubber compounds that do not flow readily, compression moulding is sometimes the only manufacturing option.
Injection moulding
This is the simplest method of converting a piece of rubber into a finished seal product. First, the rubber compound is mixed and prepared. Depending on the recipe, there can be up to 30 different individual ingredients. At this stage, the curing (or vulcanization) of the rubber hasn’t yet taken place. Therefore, the material has a stiff and non-elastic consistency (a little like thick dough). From this dough we produce a rubber blank (also known as a pre-form) by either cutting, punching or extruding cord. These blanks are normally a little bigger than the finished part (normally based on weight) and are placed into a metal moulding tool. The tool (in its simple form) is in two halves with the final product shape cut into the metal. This is known as the mould cavity.
Elastomer materials need to be specifically formulated for injection moulding to give them the required flow characteristics. The tooling is also significantly more complex compared to compression or transfer tools, especially with multi-cavity tools and cold runner blocks to reduce the waste in the sprue and runner system. Set-up times somewhat longer.
Machinery
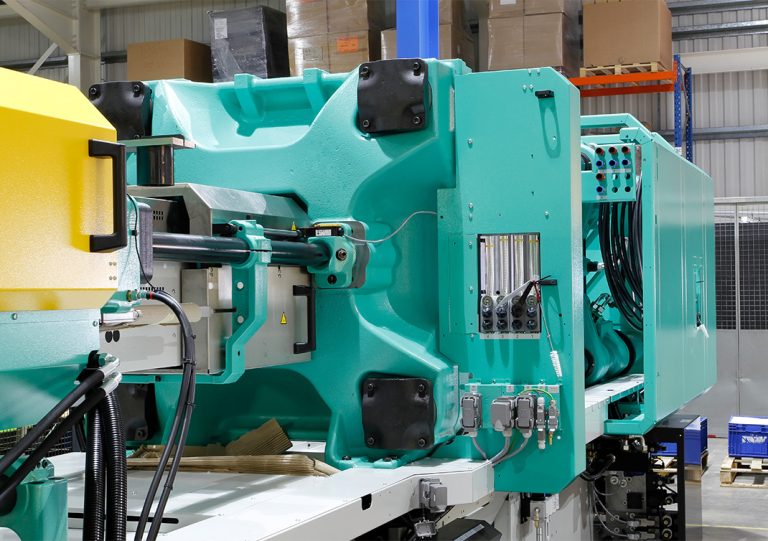
In terms of machinery, injection presses are also more complex and costly than hydraulic compression presses, but the injection moulding process can be highly automated. This, in conjunction with fast cycle times can result in very attractive manufacturing costs for parts produced in high volumes. As with the transfer process, the flow of the rubber into the cavity can be designed to reduce the risk of air trapping and give consistent material properties in the finished part.
Transfer moulding
This is a variation on compression moulding. It uses the same hydraulic compression presses, but this tooling is a little more sophisticated (and consequently a little more expensive).
Rather than loading the rubber blank direct into the cavity it’s held in a “well”, and the top tool part contains a plunger which squeezes the rubber though feed ports/gates into the cavity below. By using this approach, the cavity is closed before the rubber enters. This reduces the amount of flash left remaining on the part, and allows accurate positioning of metal or plastic inserts for two-part bonded components.
The material may need to be specifically formulated to allow it to flow through the feed gates. The result can be a more uniform part using this flow of rubber, compared to a compression moulded part where some of the rubber has not had to flow very far during the tool closure. The part and tool can be designed so that the direction of this flow acts to expel the air from the tool and prevent it becoming trapped by the rubber in the middle of the part (which can sometimes be an issue with compression moulding).
Tolerances, accuracy and consistency are improved compared to compression moulded parts but the cycle time, or throughput, is broadly the same.
There are other ways to manufacture rubber parts, including extrusion, calendaring and even 3D printing, but from comparing the three most common methods of producing an elastomer seal, we can see that considering how the part is going to be made at the start of the project is key to ensuring the technical and commercial success of the seal in the application.